Automated Snaps of Nim Using GitHub Actions
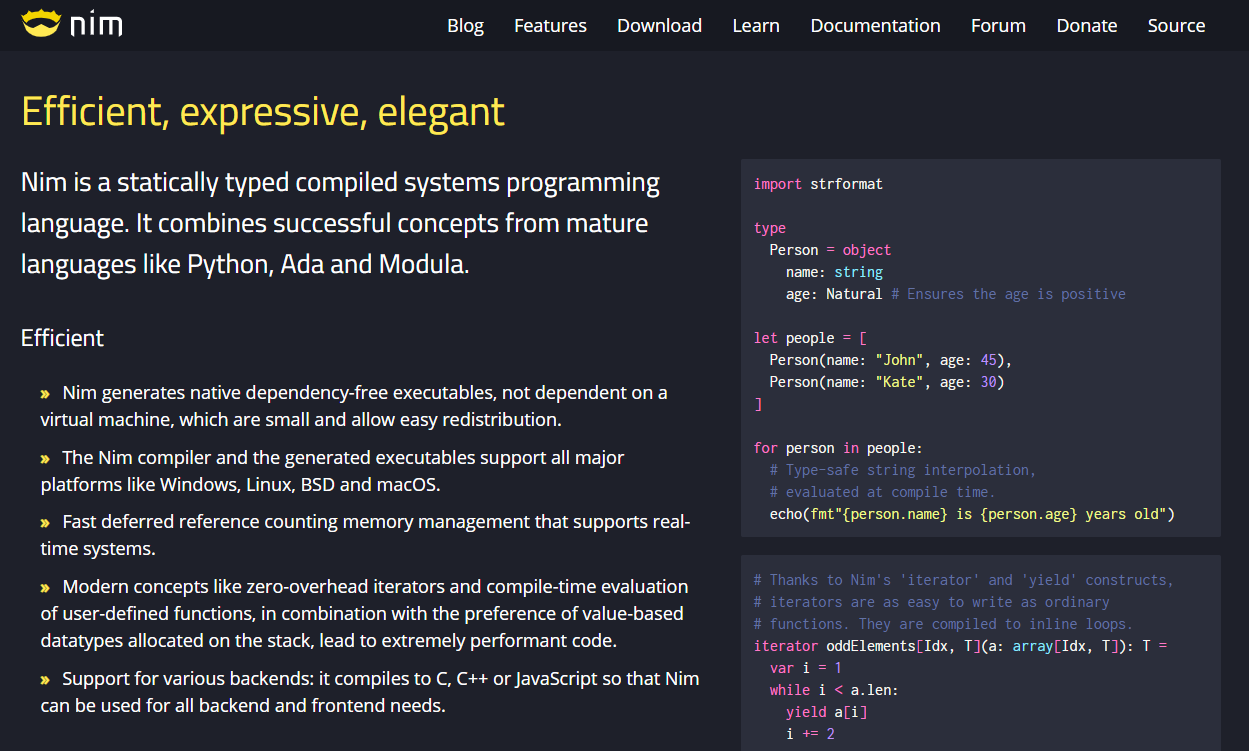
Nim is a compiled, garbage-collected systems programming language with a design that focuses on efficiency, expressiveness, and elegance.

tl;dr
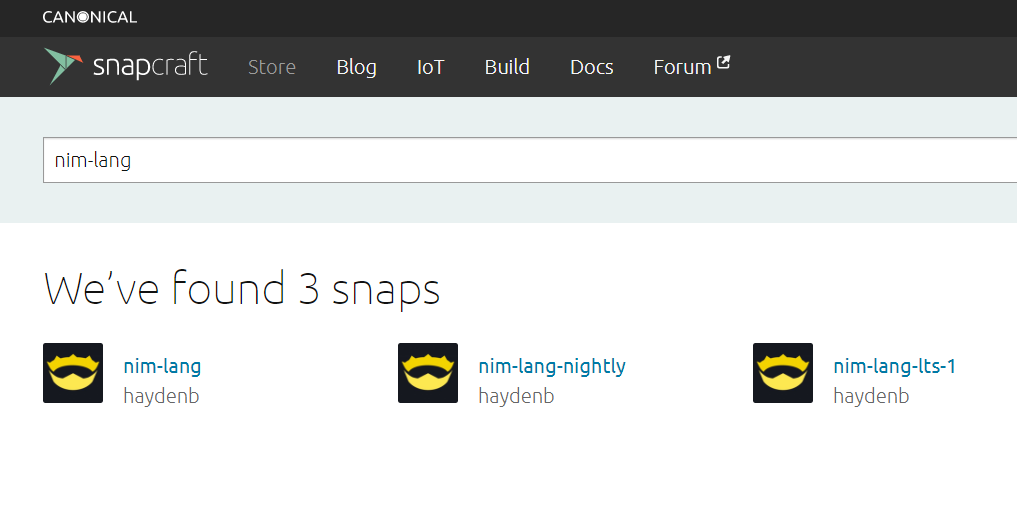
See the repository on GitHub for the code, branches, directions on installing Nim using Snap, and the current build status.

Background
Lately I have been experimenting with Ubuntu Core, which is a build of Ubuntu LTS branch that is entirely snap-based. I was saddened to find there was no snap for my current favorite programming language, Nim:
So I set out to create one. Rather than be a drive-by commit of a single snap I would have update with each new Nim release, I decided to automate the process so that the snap would be continually updated.
Build Automation
I chose the new GitHub Actions to automate everything directly from GitHub. I realized I could create a stable build from official Nim releases and a nightly build directly from the GitHub code.
I am somewhat familiar with GitHub Actions based on my experience with Azure Pipelines, which it takes it's inspiration from, but this was my first major GitHub Actions project. I still miss the GUI Pipeline creator from Azure Pipelines and wish Microsoft had made it compatible with it's new all-YAML approach and brought it to GitHub Actions.
In the process of working on this project, Nim reached 1.0 and announced a long-term stable branch of 1.0 called 1.0.x, so I felt I had to add a build for that as well.
Layout
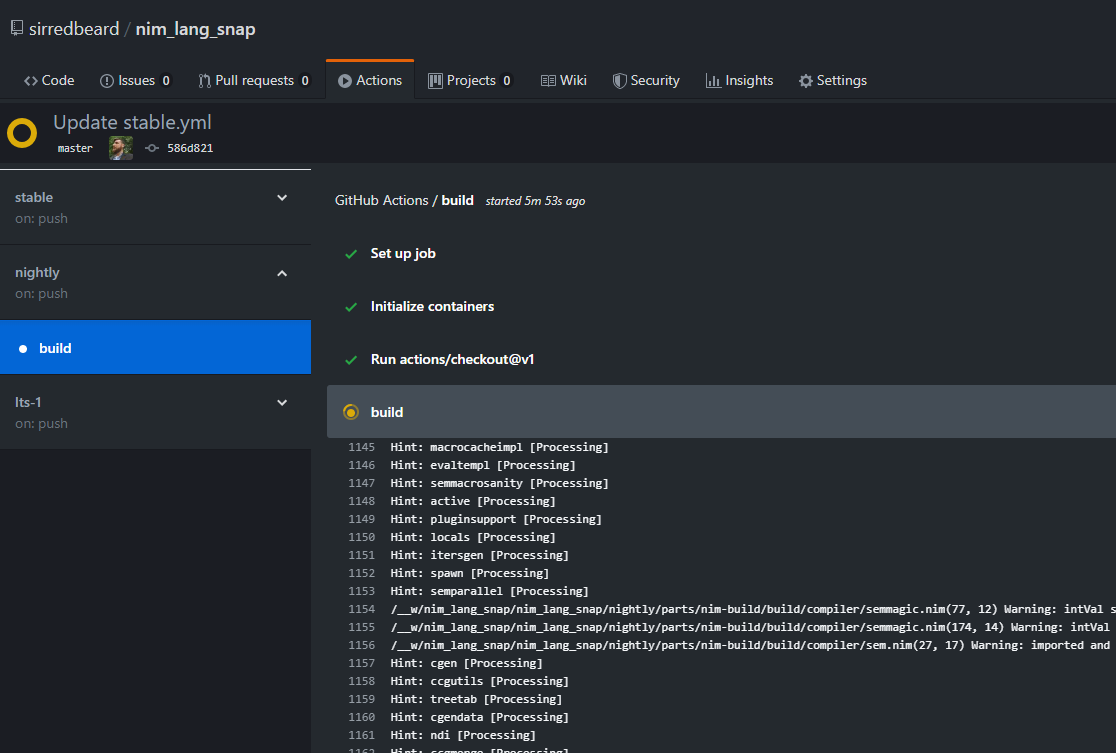
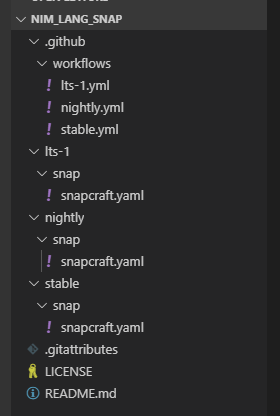
Each build (stable, nightly, and LTS 1.0.x) has a GitHub Action and a Snap template The GitHub Actions are located in .github/workflows and are stored as stable.yml, nightly.yml, and lts-1.yml. The Snap template, snapcraft.yaml, for each build is stored in /stable, /nightly, or /lts-1, in a subdirectory called /snap.
The Stable and LTS snap templates are actively modified by the GitHub Actions before being build based on input about available releases from the GitHub API. The Nightly snap template requires no dynamic modification because it always builds the current development branch from GitHub and does not track a version number.
The following will walk you through the LTS branch build code. This was from an early version of the code and changes may have been made. A direct link to the file with the most recent changes is provided.
LTS Build GitHub Action
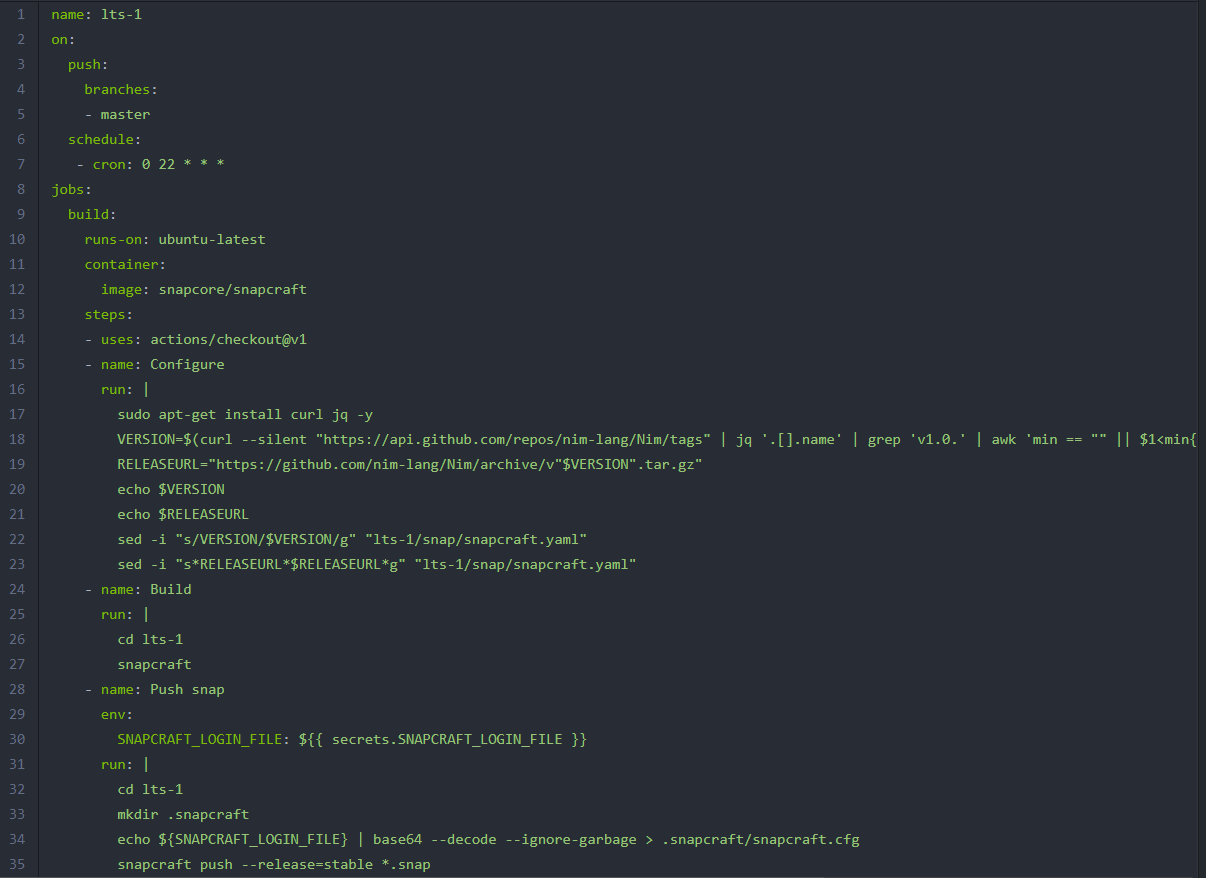
name: lts-1
This sets the name of our action as lts-1.
on:
push:
branches:
- master
schedule:
- cron: 0 22 * * *
This will trigger a build when a push is made to the master branch of our GitHub repository and nightly at 10pm.
jobs:
build:
runs-on: ubuntu-latest
container:
image: snapcore/snapcraft
We define out job, build, and specify that we are running on Ubuntu 18.04 inside the official Snapcraft Docker container.
steps:
- uses: actions/checkout@v1
Here we define the steps in our job. The first step here is to checkout our GitHub repository which importantly contain our snap templates. This is accomplished using the Checkout action.
- name: Configure
run: |
sudo apt-get install curl jq -y
VERSION=$(curl --silent "https://api.github.com/repos/nim-
lang/Nim/tags" | jq '.[].name' | grep 'v1.0.' | awk 'min == ""
|| $1 <min{min=$1} $1>max{max=$1} END{print max}'
| tr -d 'v' | tr -d '"')
RELEASEURL="https://github.com/nimlang/Nim/archive/v"
$VERSION".tar.gz"
echo $VERSION
echo $RELEASEURL
sed -i "s/VERSION/$VERSION/g" "lts-1/snap/snapcraft.yaml"
sed -i "s*RELEASEURL*$RELEASEURL*g" "lts-1/snap/snapcraft.yaml"
Next we configure our build with shell script called with the Run action. First we install curl and jq, needed for parsing the GitHub API responses. Then we call the GitHub API using curl, requesting all the available tags, we pick out the version number keys with jq, then pick out all the 1.0.x version numbers with grep, then sort them using awk to find the highest 1.0.x build as VERSION, and trim the data using tr.
This highest 1.0.x build will be what we push to the Snap store as the most recent LTS and from that we can extrapolate the RELEASEURL .tar.gz sources file of our VERSION. We log the version number and release URL and then update our Snap template with VERSION and RELEASEURL.
- name: Build
run: |
cd lts-1
snapcraft
With our Snap template configured, we now drop into our snap directory and run snapcraft to build our snap.
- name: Push snap
env:
SNAPCRAFT_LOGIN_FILE: ${{ secrets.SNAPCRAFT_LOGIN_FILE }}
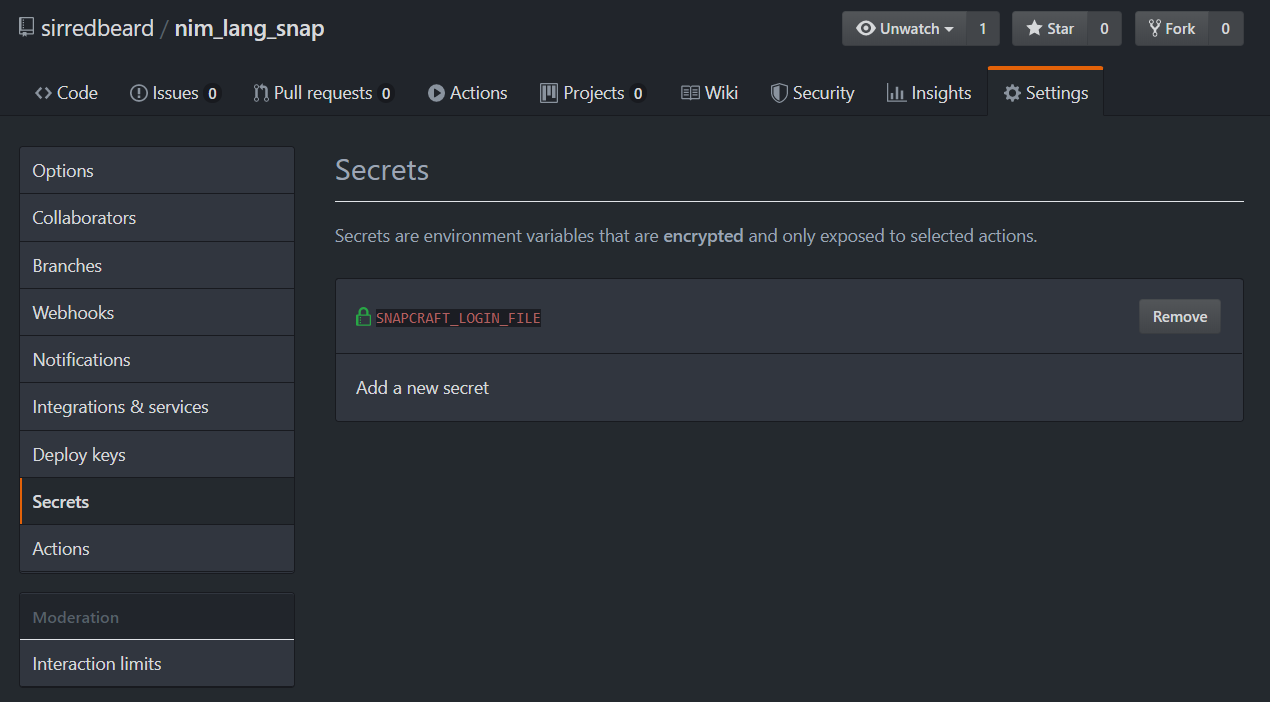
Now we need to push our snap to the Snapcraft store. To authenticate with the Snapcraft store without posting our credentials publicly on GitHub we used a Snapcraft config file that we encode to base64 and store as a GitHub Actions secret. We then invoke that secret as an environmental variable with env.
Sidenote: You create the file and convert to a usable GitHub Actions secret as follows:
$ snapcraft login
$ snapcraft export-login snapcraft.login
$ cat snapcraft.login | base64 > snapcraft.login.base64
Then copy and paste the contents of the file into a GitHub Actions secret entitled SNAPCRAFT_LOGIN_FILE:
run: |
cd lts-1
mkdir .snapcraft
echo ${SNAPCRAFT_LOGIN_FILE} |
base64 --decode --ignore-garbage > .snapcraft/snapcraft.cfg
snapcraft push --release=stable *.snap
Here we push our snap to the Snapcraft store. But first we create a folder for our snapcraft config file, echo the base64-encoded GitHub Actions secret, pipe it through base64, and save it as a file. Then we push our snap tagged as stable to nim-lang-lts-1 on the Snapcraft store.
Now let's see what's happening in the Snapcraft template.
LTS Build Snapcraft Template
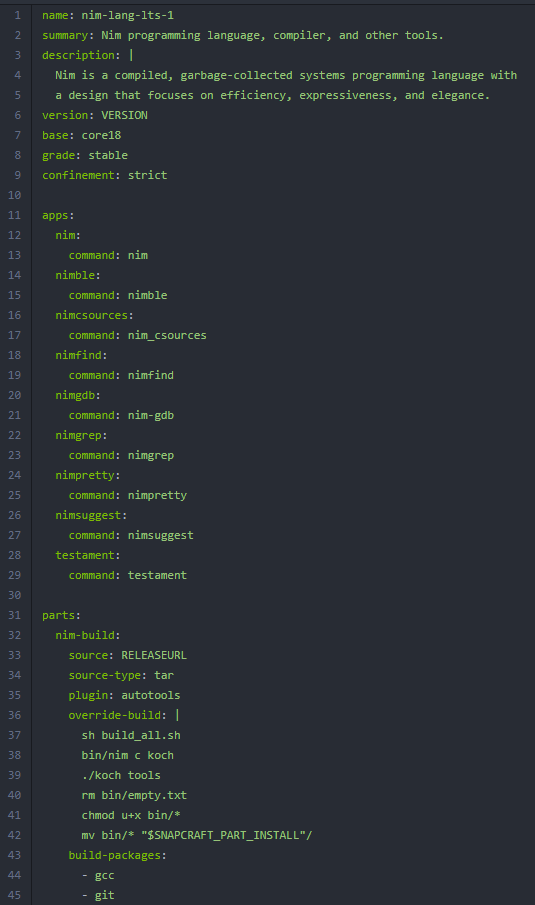
name: nim-lang-lts-1
summary: Nim programming language, compiler, and other tools.
description: |
Nim is a compiled, garbage-collected systems programming language with
a design that focuses on efficiency, expressiveness, and elegance.
version: VERSION
base: core18
grade: stable
confinement: strict
Our snap template opens with naming our template, a short summary, a detailed description, and placeholder for our version. The snap is targeted to core18, the most recent version of Ubuntu Core shipping with snapd, based on Ubuntu 18.04 LTS. The snap is tagged as stable and set to strict snap confinement.
apps:
nim:
command: nim
nimble:
command: nimble
nimcsources:
command: nim_csources
nimfind:
command: nimfind
nimgdb:
command: nim-gdb
nimgrep:
command: nimgrep
nimpretty:
command: nimpretty
nimsuggest:
command: nimsuggest
testament:
command: testament
In the apps section of our snap template we enumerate the binaries that are shipping as part of the snap. Because these are command line applications no additional settings are required for each command. If we wanted an command that launched a GUI app there would likely be some options you would also set in the command section here for X. Each of these is exposed once installed as nim-lang,nim, nim-lang-night.nim, or nim-lang-lts-1.nim.
parts:
nim-build:
source: RELEASEURL
source-type: tar
plugin: autotools
Here we define the parts of our build, nim-build. We have a placeholder for RELEASEURL that is replaced with a link to the .tar.gz sources the most recent version of Nim 1.0.x. We let snap know it's a tar and we specify an autotools build environment, though we do not leave the build up to snap.
override-build: |
sh build_all.sh
bin/nim c koch
./koch tools
rm bin/empty.txt
chmod u+x bin/*
mv bin/* "$SNAPCRAFT_PART_INSTALL"/
build-packages:
- gcc
- git
Nim ships with a custom build script, so we override the default build step of the snap and specify our own steps. First we call the build script, build koch, and then build additional Nim tools with koch. Then we remove some empty files, mark our files as executable, and move them into our install folder. We also make sure gcc and git and both available during the build stage.
Conclusion
I created three automated builds of Nim and pushed each of them to the Snapcraft store. These should function with minimal intervention going forward. Any issues and I will automatically be notified by e-mail. I learned more about GitHub Actions and building Snaps with this project. I also learned that using the official Snapcraft Docker image works much better than trying to run a bare metal Ubuntu VM and then attempt to configure Snapcraft and Multipass on it.


