Microsoft's Virtual Machine Hub: Hyper-V Server 2019
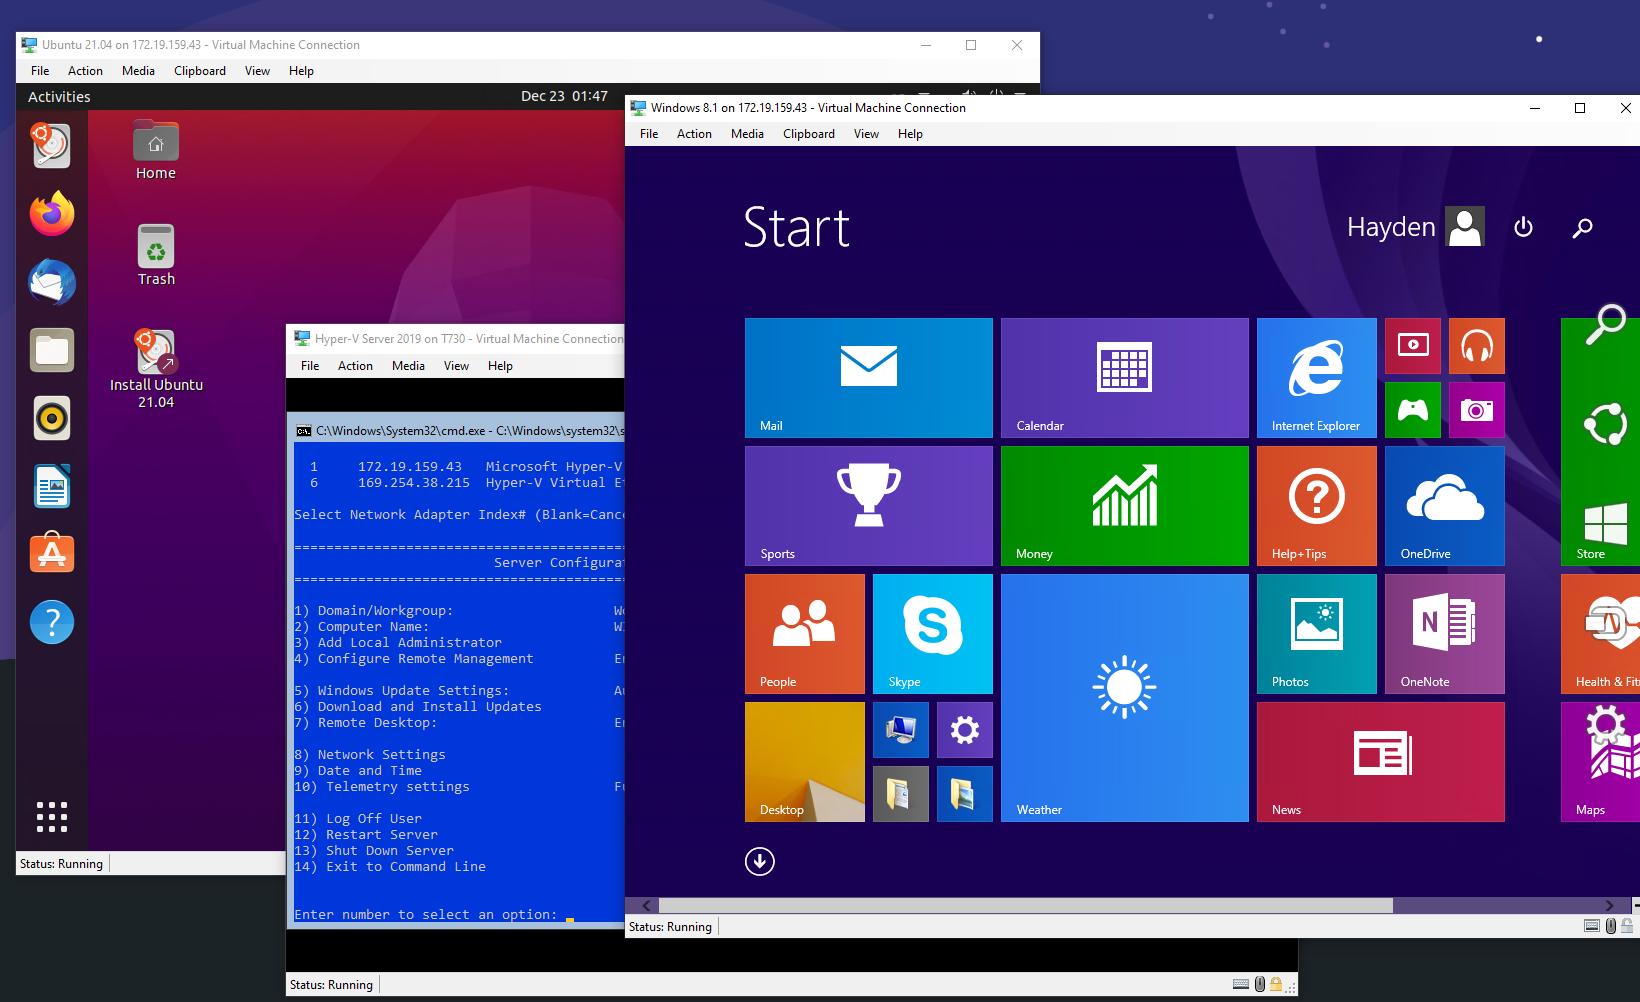
Getting to know Hyper-V Server by running Windows 8.1 and Ubuntu 21.04 on Hyper-V Server 2019...on Hyper-V on Windows 10 Pro.
Hyper-V Server 2019 is a lightweight version of Windows 10 Server 2019 that is optimized to act only as a Hyper-V host.
If you are familiar with Windows 10 Server, think of Hyper-V Server as Windows 10 Server with just the Hyper-V Role and a very minimal TUI.
Hyper-V supports Windows 7, 8.1, 10, as well as a variety of Linux and BSD guests.
What is nifty about Hyper-V Server is that it is free from Microsoft. Microsoft provides an unlimited evaluation period to use it.
Note though, you will need proper licenses for Windows versions running on top of Hyper-V Server.
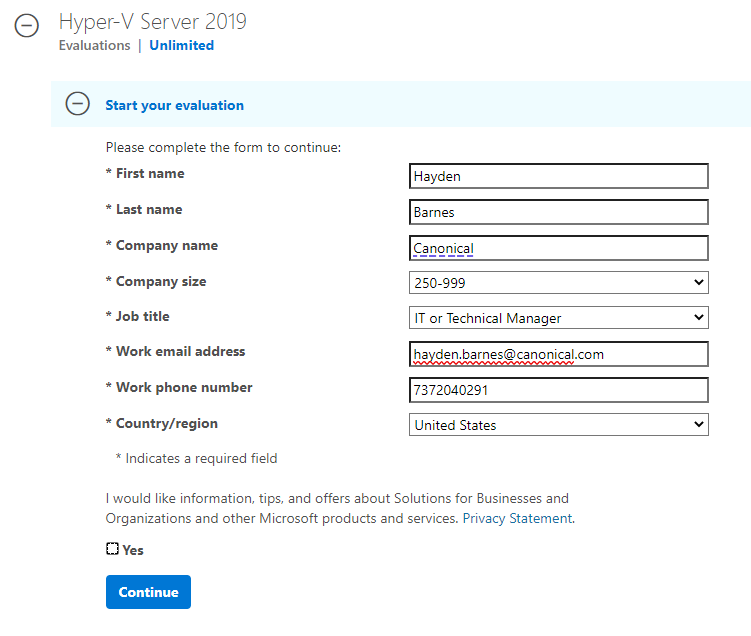
You can download Hyper-V Server 2019 for free directly from Microsoft:
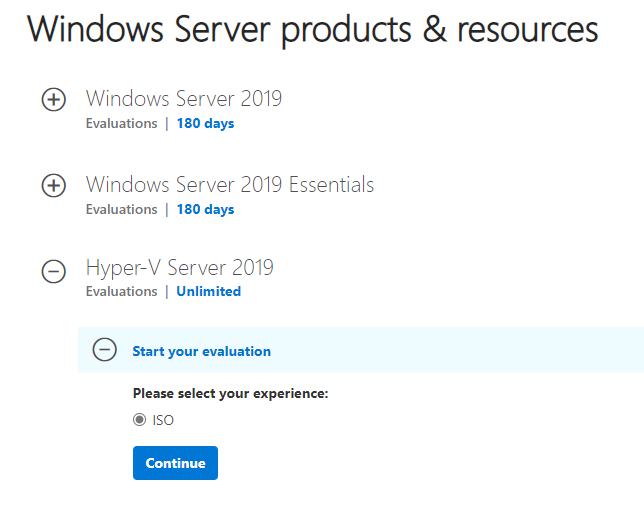
You simply need to complete some work information:
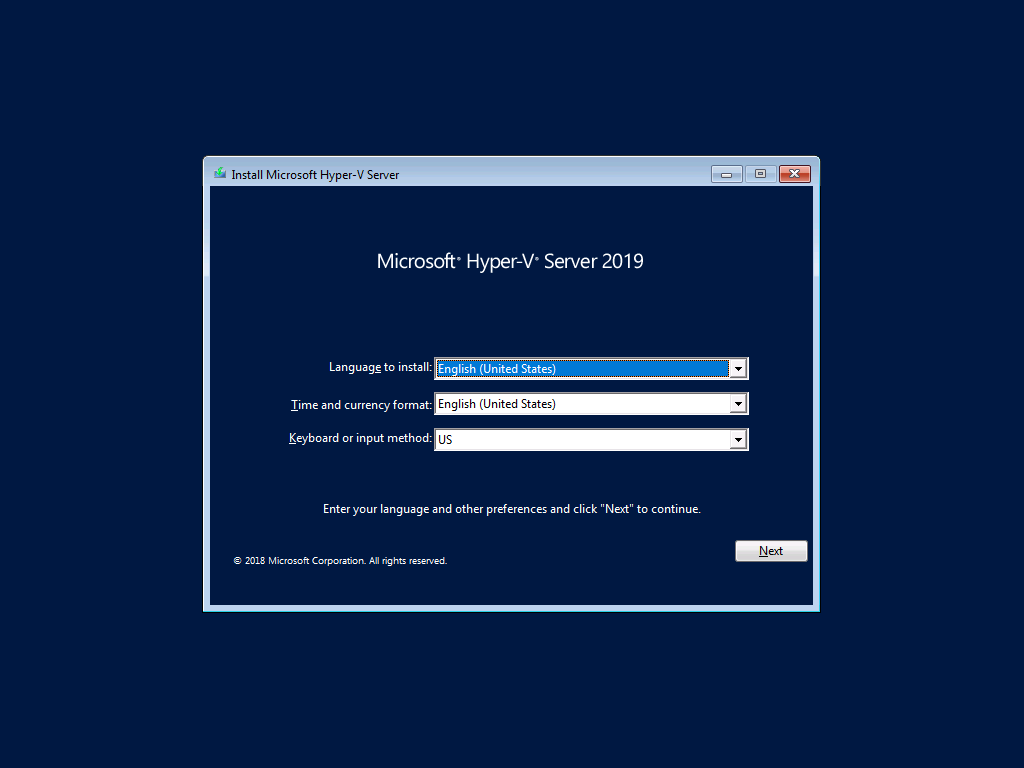
Select your language:

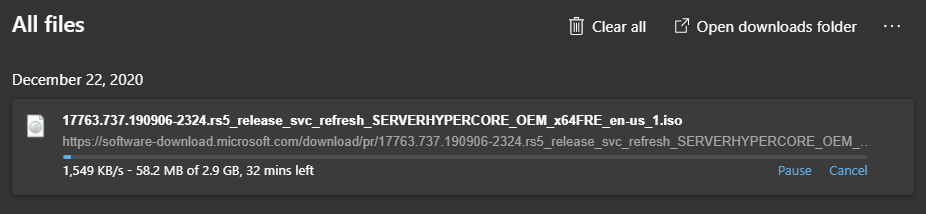
And download your ISO:

Which is about 2.9 GB:
You can burn your Hyper-V Server ISO to a DVD or to a USB with Rufus. You could even run Hyper-V Server inside another type 1 hypervisor such as Hyper-V or KVM that supports nested virtualization extensions.
The initial install process for Hyper-V Server looks remarkably like Windows 10. Select your language and a new install:
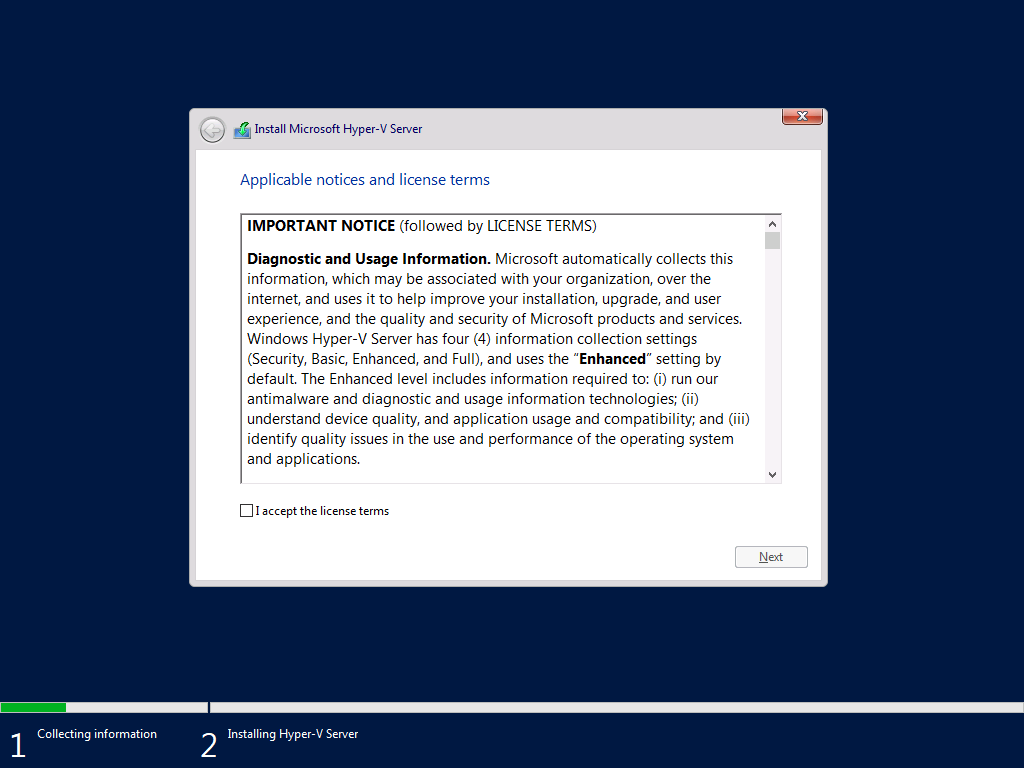
Agree to the EULA:
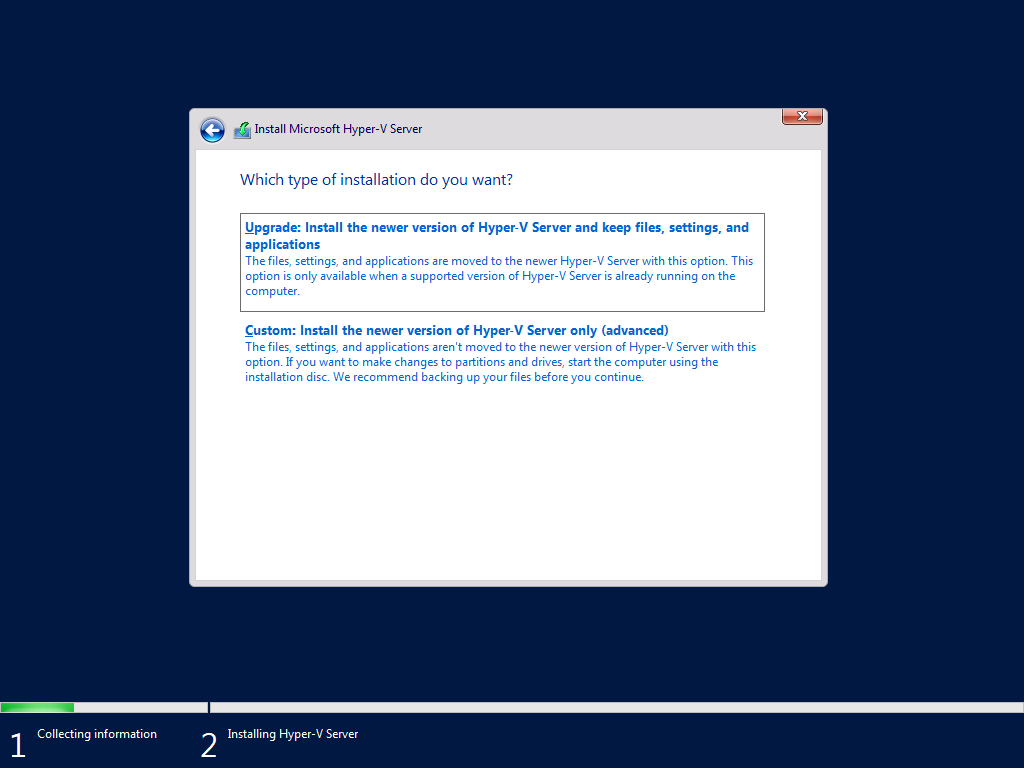
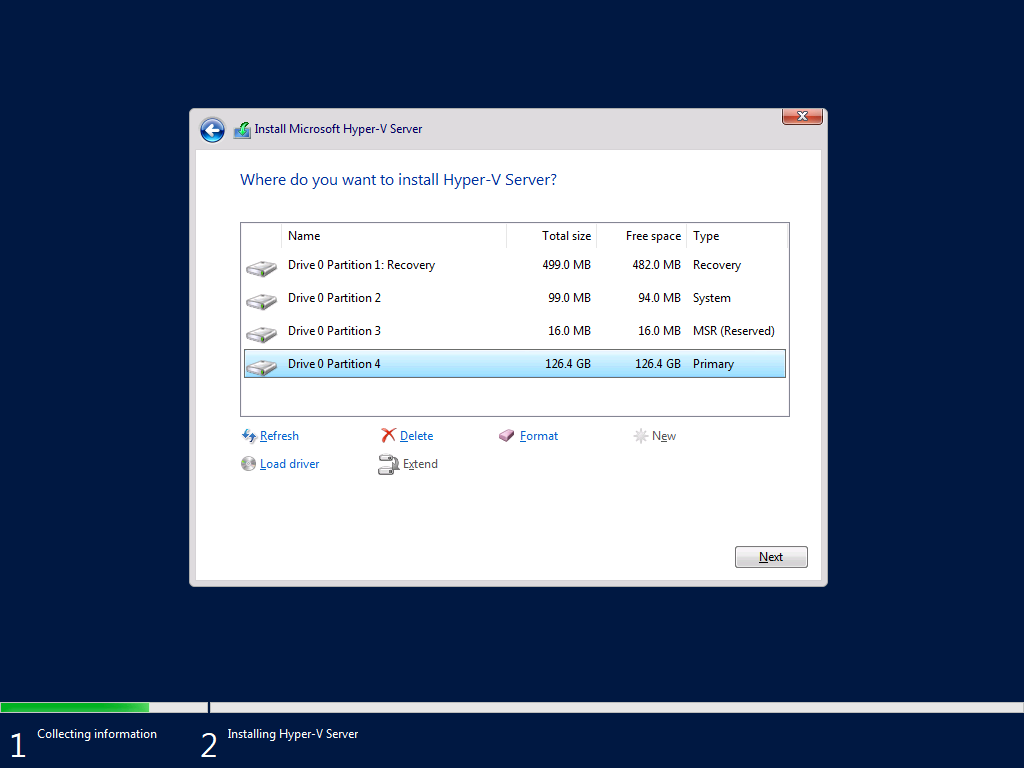
Select 'Custom' install unless you are upgrading:
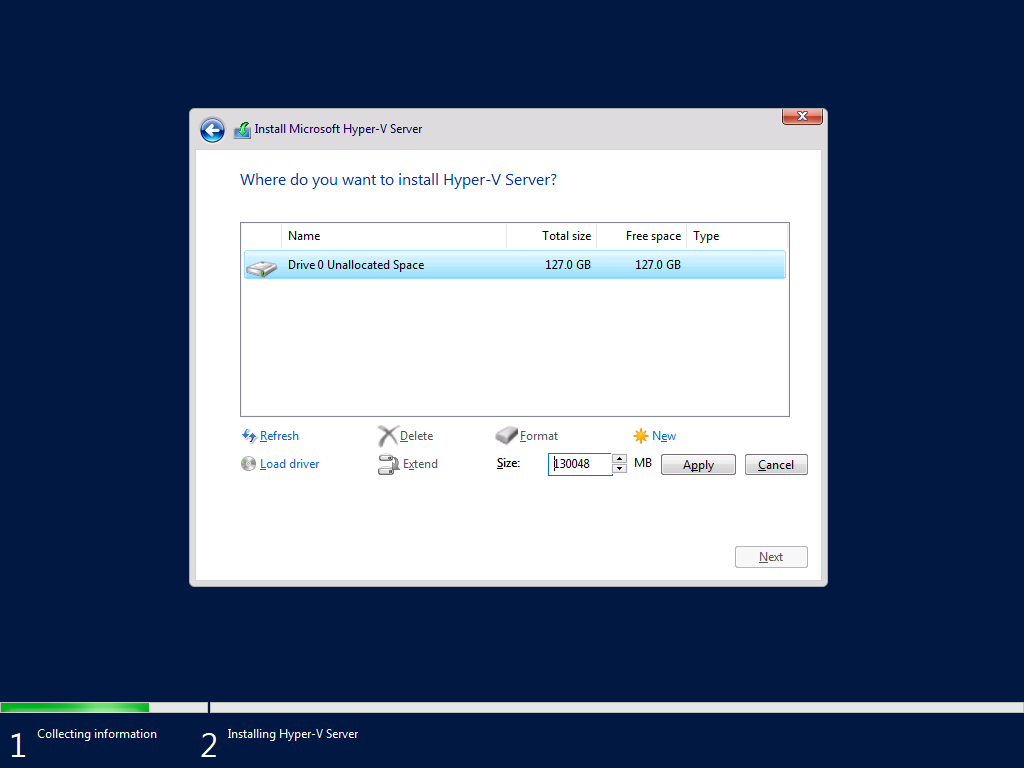
Create new and format virtual disks, as needed:
Windows will create some system and reserved partitions:
Profit:
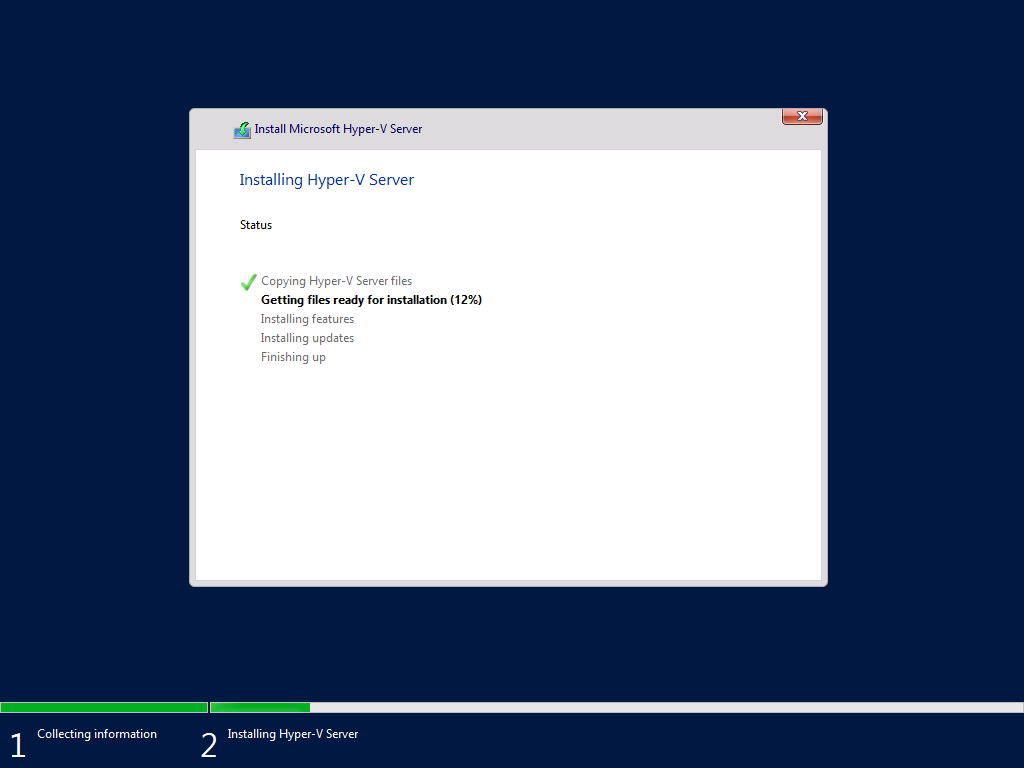
The first run of Hyper-V Server looks a bit sparse. Get used to it. Hyper-V Server is all managed on the device in a terminal user interface (TUI). It is also extremely fast.
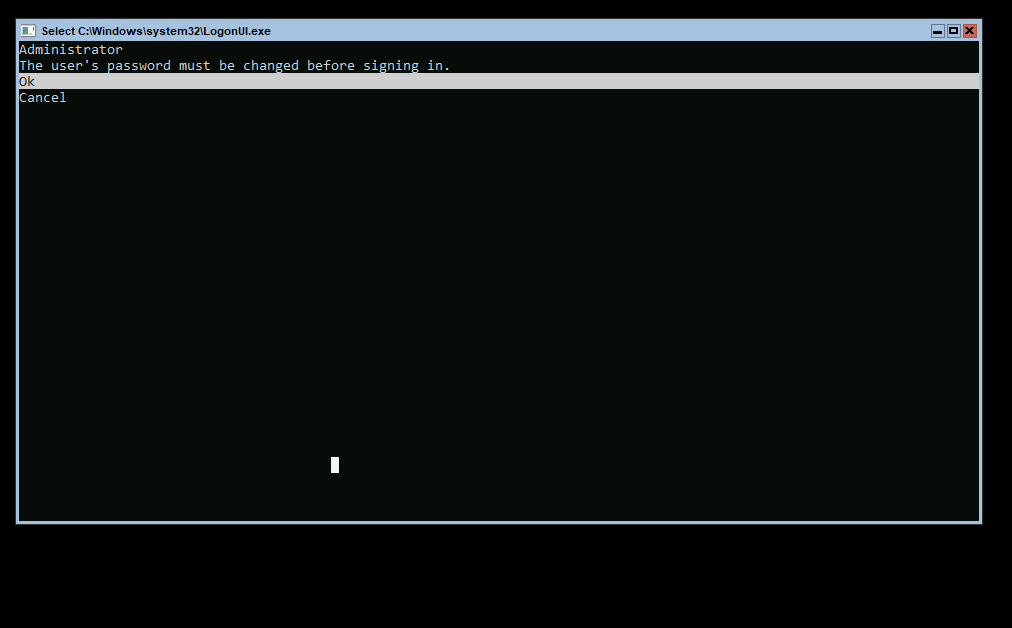
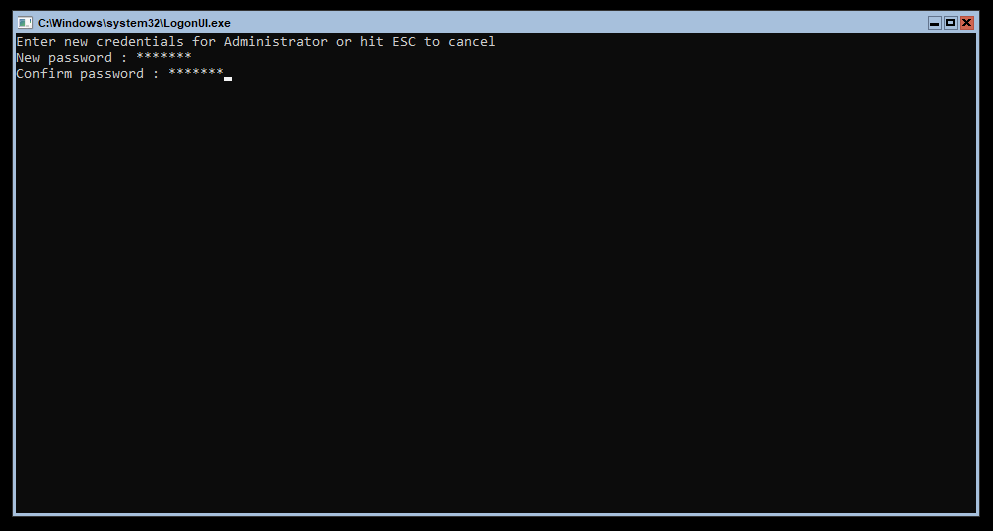
Create a new password for Administrator:
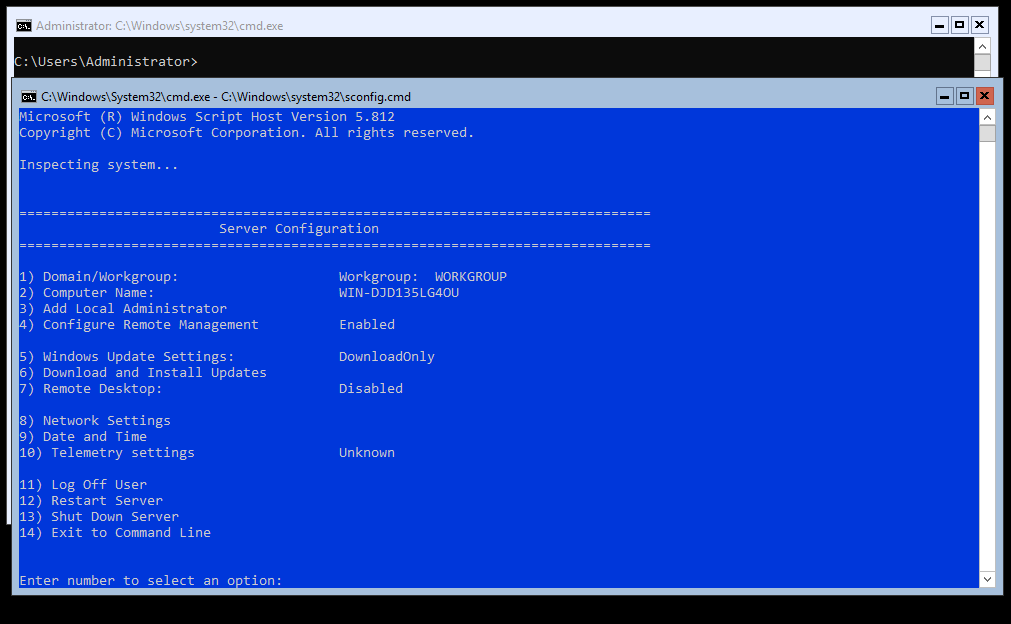
Then we get to the main show: A Command Prompt and our Hyper-V Server Configuration script. That's all we need to get started.
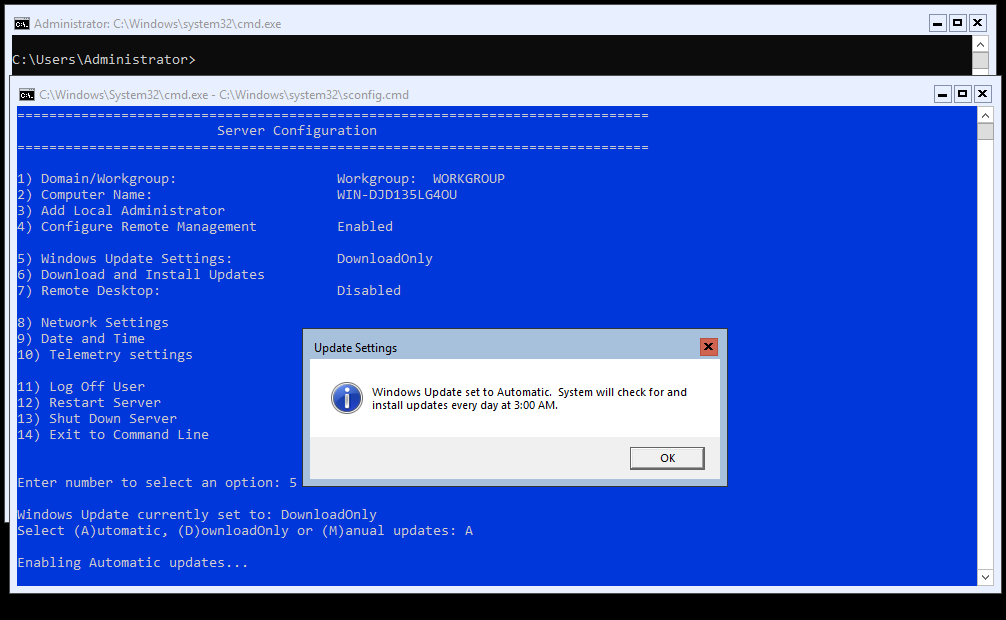
The first thing I do is enable Automatic Updates for security purposes with option 5:
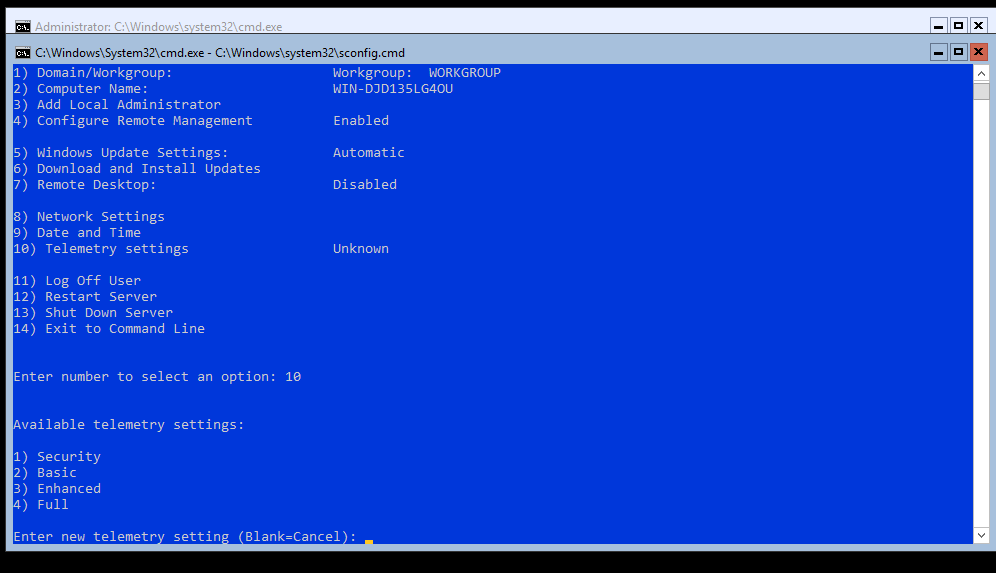
I also enable Telemetry so Microsoft can see, anonymously, what I am doing with Hyper-V Server with option 10:
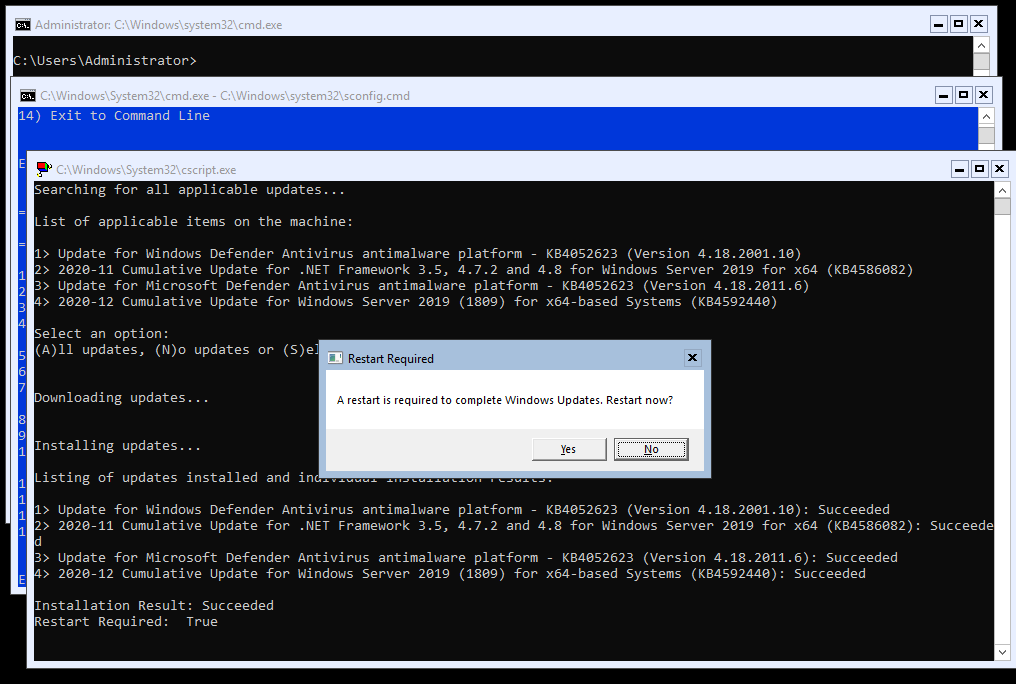
Then I manually run updates with option 6, which will end with needing to restart:

Restart as needed:
Log back into our freshly updated system:
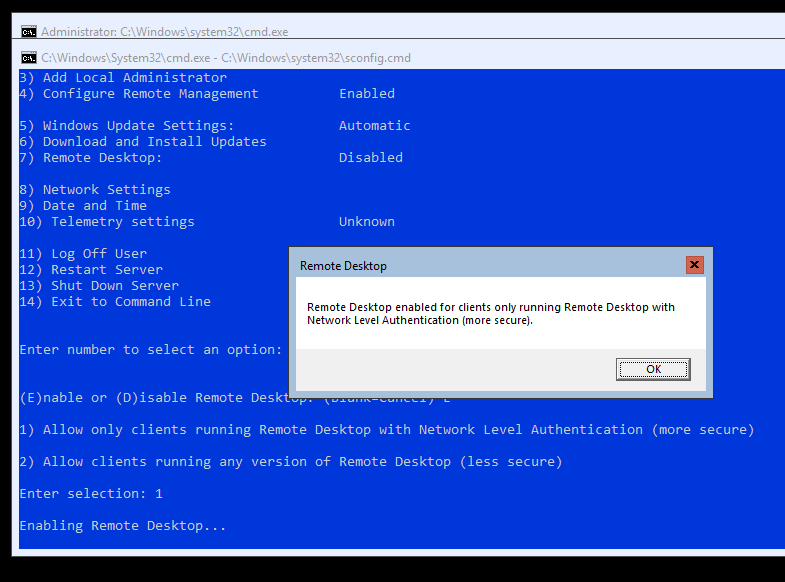
You can enable Remote Desktop to Hyper-V Server, allowing the server to act as a headless VM server, with option 7:
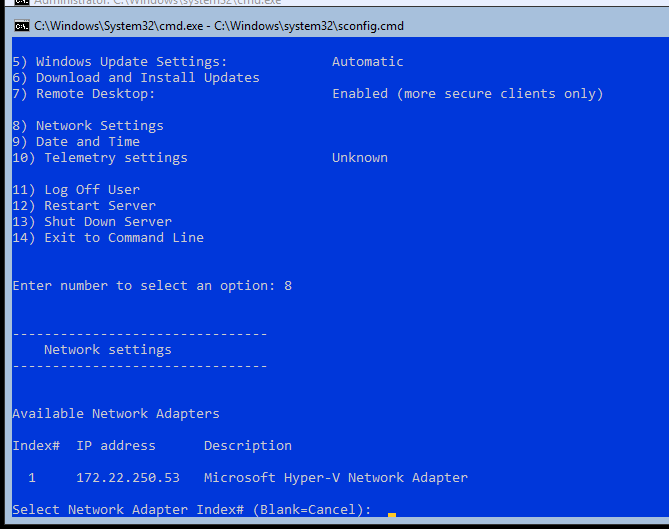
After enabling, you can try Remote Desktop by getting the Hyper-V Server's IP address with option 8:
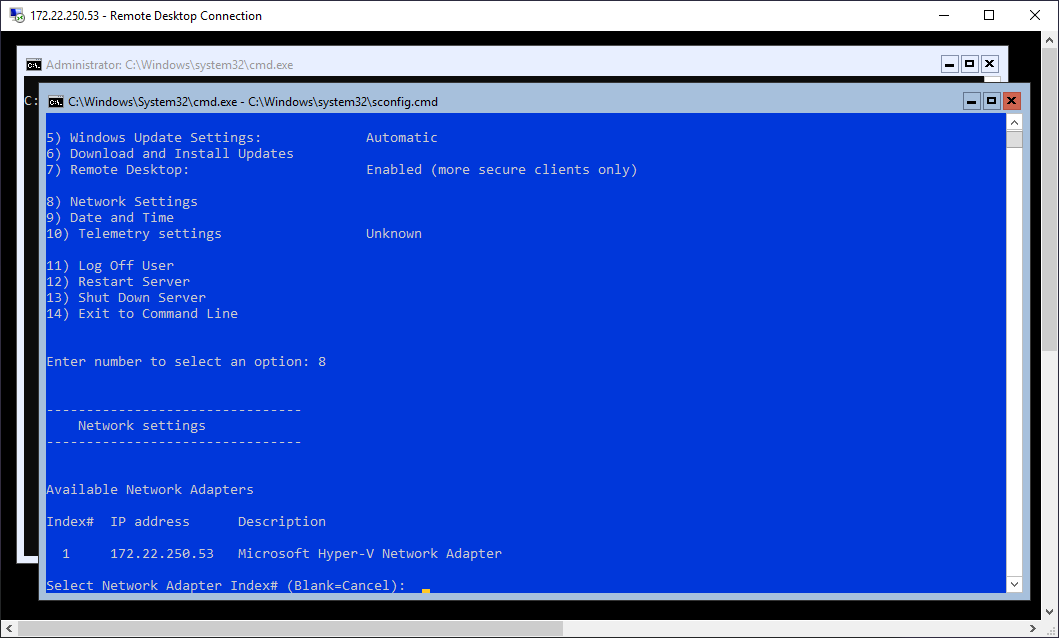
Then connect from another device with the Remote Desktop client built into Windows:

And we see:
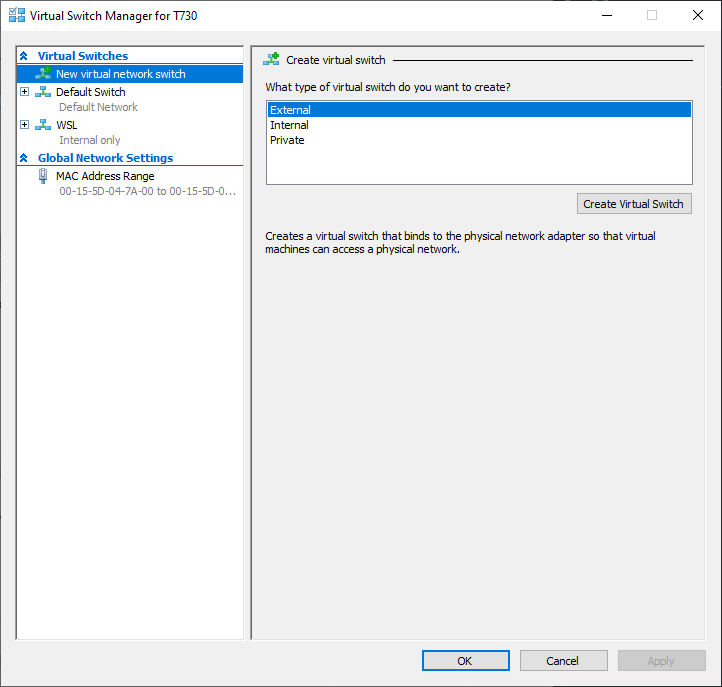
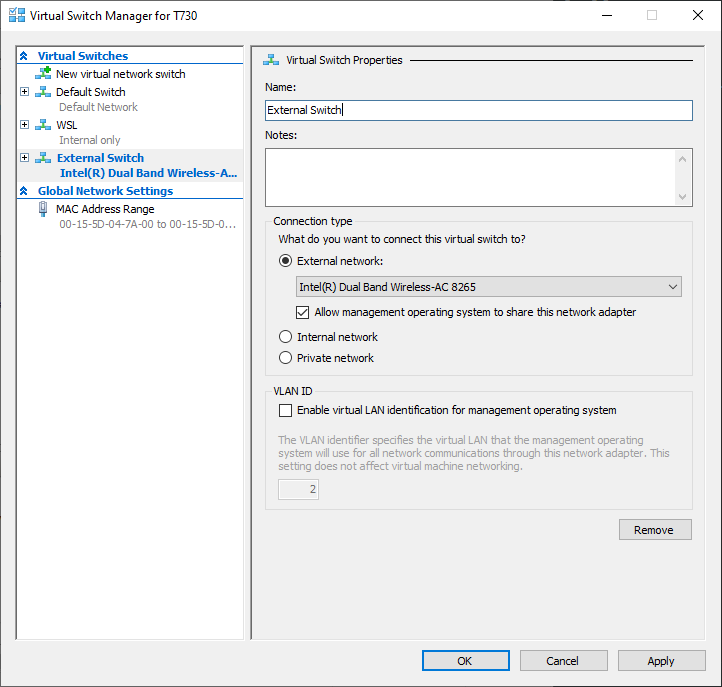
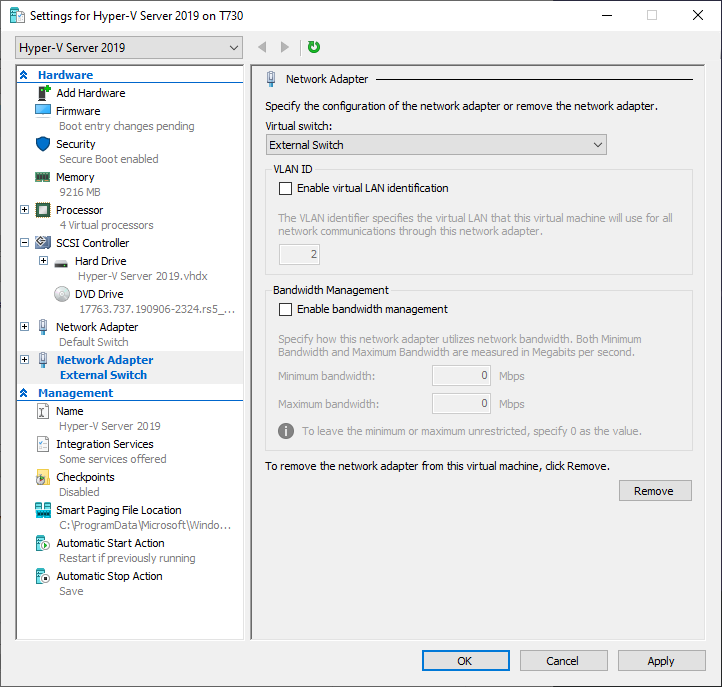
If you are running Hyper-V Server inside Hyper-V (and not on bare metal) then you will need to shutdown your VM, go to your Virtual Switch Manager on your host, add an External Switch, which is reachable from outside your localhost, and then add it to your Hyper-V Server VM:

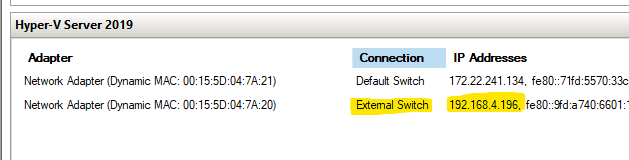
You can then access Remote Desktop from other devices on the network, using the External Switch IP:
It is also possible to forward the Remote Desktop connection without using an external switch, but this quick and dirty for our lab testing.
If you are running Hyper-V Server on Hyper-V and run into issues starting new VMs you may need to shut down and enable nested virtualization for that VM:
Set-VMProcessor -VMName "Hyper-V Server 2019" -ExposeVirtualizationExtensions $true
Note: Hyper-V nested virtualization works well on Intel chips. On AMD chips you will need Windows 10 build 19636 or higher and currently nested KVM acceleration is not supported.
You can also access your Hyper-V Server with an RDP client like Remmina:
sudo apt install remmina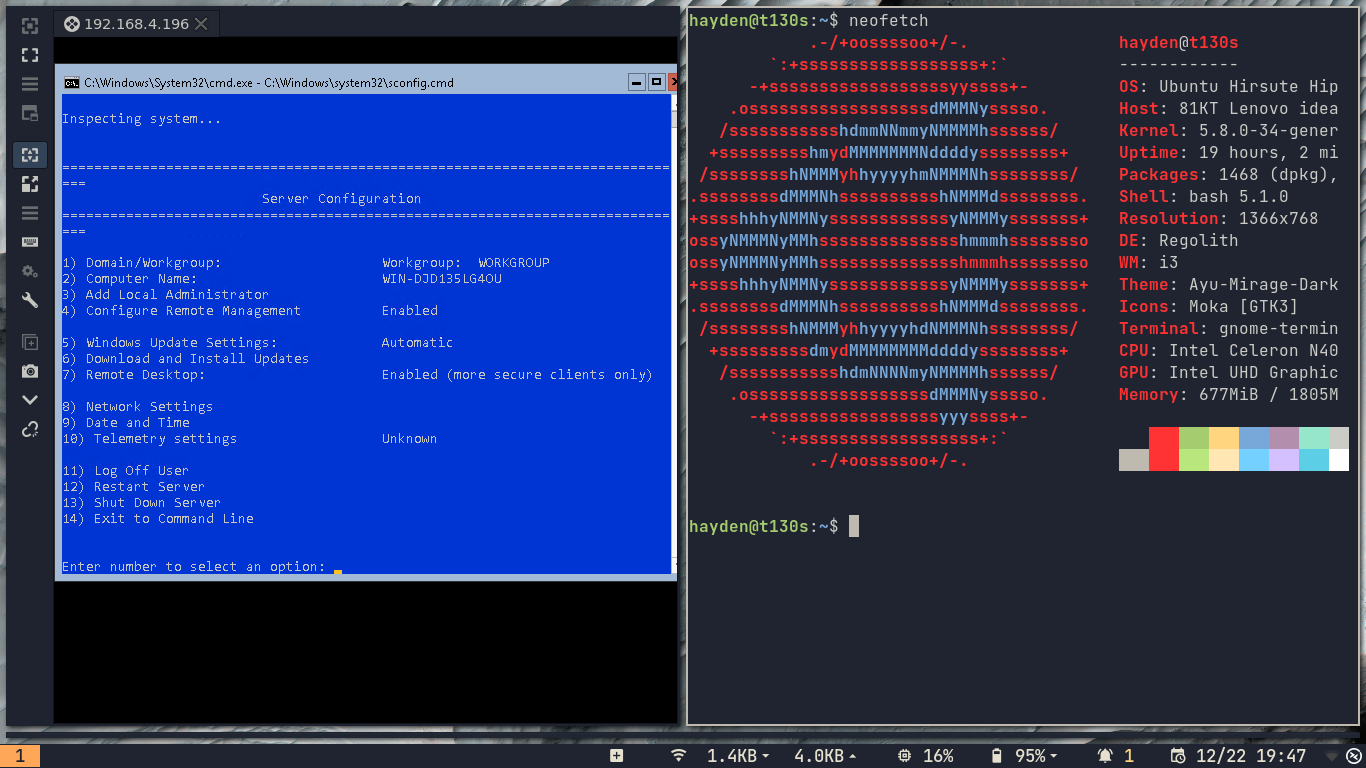
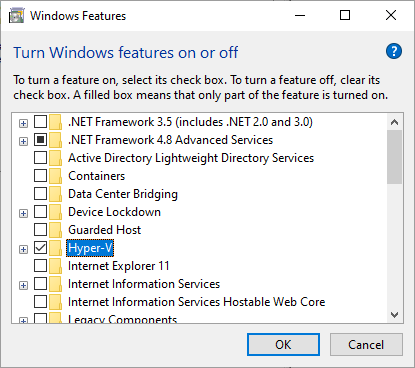
You really get the most from your headless Hyper-V Server by connecting it to Hyper-V Manager from another Windows 10 client or using PowerShell.
Hyper-V Manager requires Windows 10 Pro, Enterprise, or Education. If you can't find Hyper-V Manager by searching the Start Menu, you may need to enable it in Windows Features:
Or in PowerShell as Administrator:
Enable-WindowsOptionalFeature -Online -FeatureName Microsoft-Hyper-V -AllOnce installed, we can use Hyper-V Manager on our client locally or to connect to Hyper-V Server and create and manage VMs there.
The idea of using a client and server is that you could use Hyper-V Manager on a power-efficient portable client device while running Hyper-V Server and mulitple OS workloads on your stationary workstation or bare metal server.
The next few steps are can be skipped if you have Active Directory on a Domain with Hyper-V Administrator permissions set. This is common in enterprise environments to lock everything down and make it more secure.
For our testing purposes today, we do not though. We are connecting from an arbitrary client to an arbitrary Hyper-V Server, so we need to do a couple extra steps before we can connect.
On our Windows 10 client we need to configure WinRM. Open PowerShell as Administrator and run:
winrm quickconfig
Do not be alarmed by the error. It is okay the WinRM firewall exception will not work here because we will not be remotely managing our client, we just need WinRM to be enabled and running on our client to handle the credential negotiation with our Hyper-V Server.
Next, we need to add the IP address of our Hyper-V Server to our WinRM client Trusted Hosts list:
Set-Item WSMan:\localhost\Client\TrustedHosts -Value '172.22.248.88'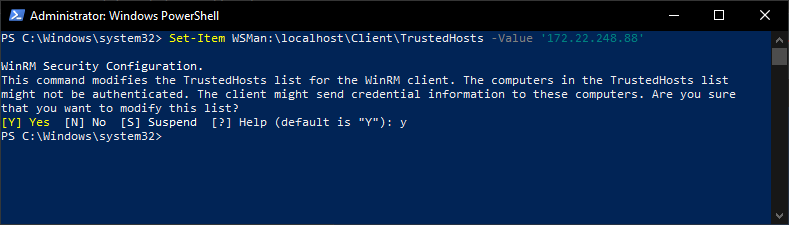
Finally, we need to store the Administrator and password credentials for our Hyper-V Server (substituting the IP address or server name, as needed):
cmdkey /add:172.22.248.88 /user:172.22.248.88\Administrator /pass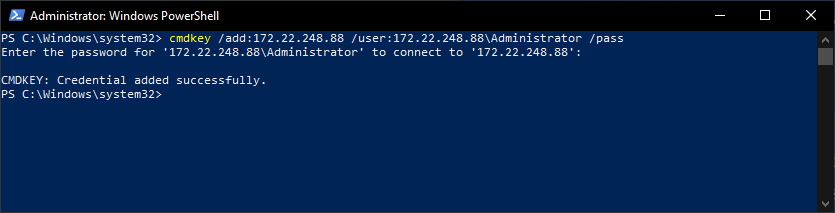
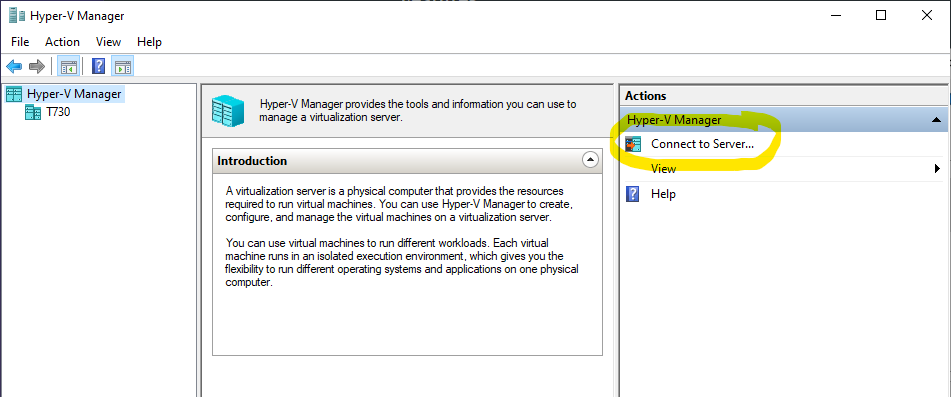
Back in Hyper-V, to connect to a Hyper-V Server, click 'Connect to Server':
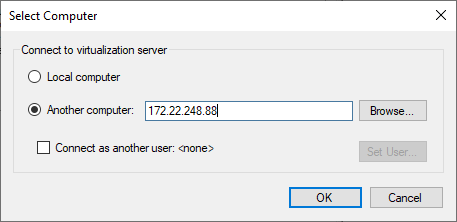
Type the IP address of our Hyper-V Server:
And we are now connected!
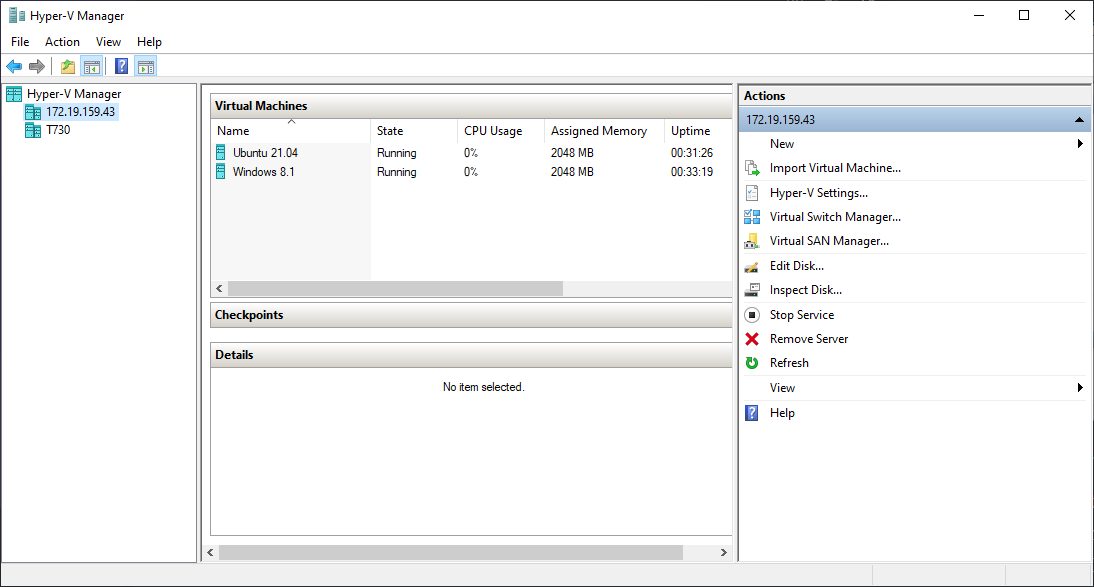
In Hyper-V Manager we now see a connection to our Hyper-V Server at 172.19.159.43:
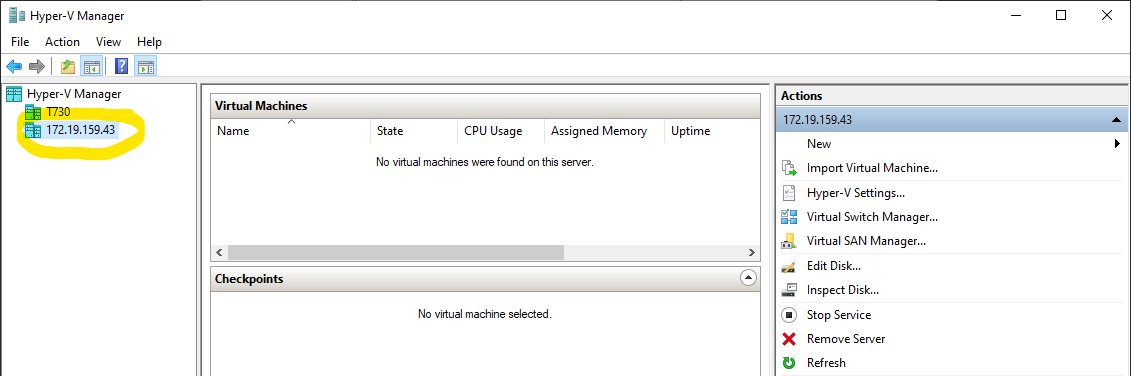
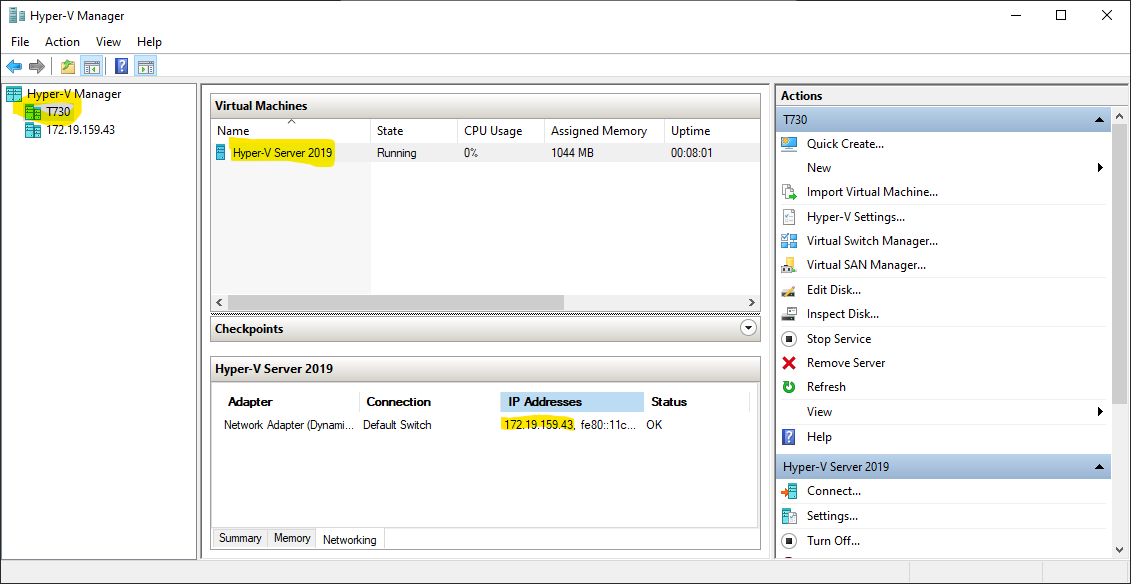
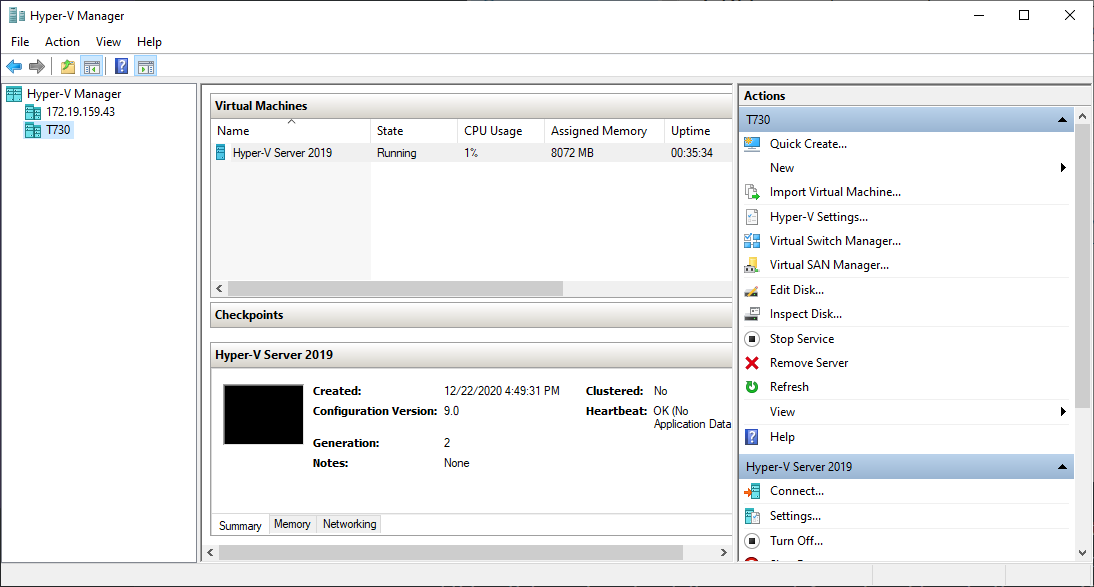
In my case, where I am running Hyper-V Server on Hyper-V, we also see a Hyper-V session running locally at T730, which is running our Hyper-V Server image:
So now what?
We have:
- Hyper-V Server 2019 installed and configured
- Updates applied
- Automatic updates enabled
- Telemetry on
- Remote Desktop access from Windows and Linux
- In my case, possibly yours, doing it all from inside Hyper-V...because we can
Why don't we install some Virtual Machines?
Such as, Windows 8.1?
Grab an ISO from Microsoft.
Stash it on easily accessible NAS location. Why? It needs to be accessible from your Hyper-V Server. If you need to, you can share your Downloads folder out on the network using Windows File Sharing, just don't forget you did later.
Create a new VM just like you would if it were local, setting the bootable image file to the ISO on your NAS/network share:
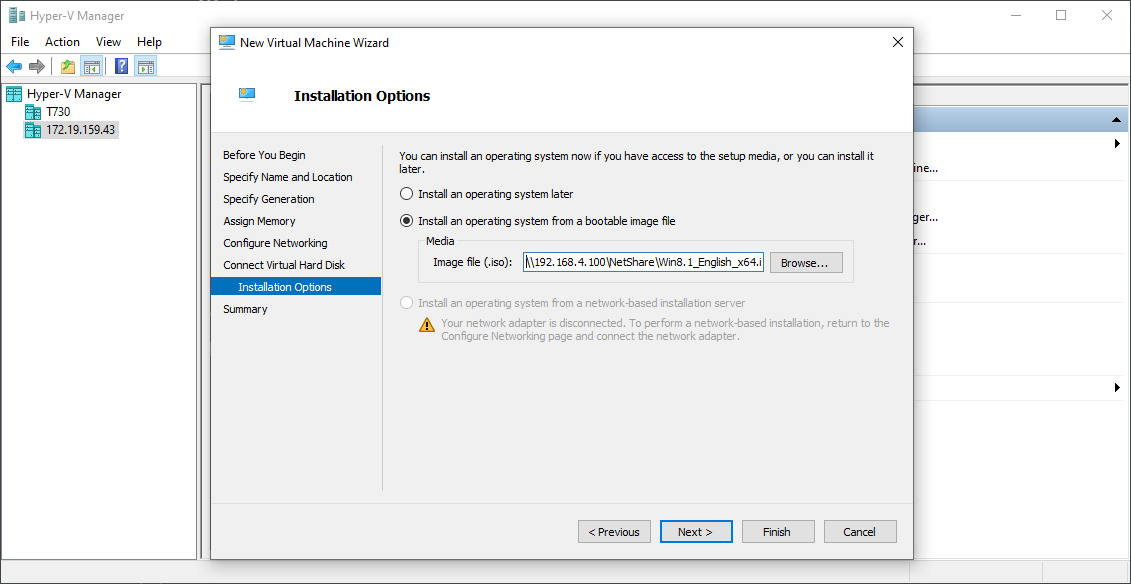
Same goes for Linux ISOs.
Install just like your regular VM and voila:

Hyper-V Server 2019 makes for a fast remote/headless virtual machine hub for mixed Windows and Linux environments.
Experienced Windows administrators should feel comfortable using Hyper-V Server 2019 deploying Linux servers alongside their existing Windows infrastructure.
The speed with which Hyper-V Server can run Windows workloads is impressive.
As Windows administrators become more comfortable with Linux and reduce reliance on legacy Windows workloads, it may make sense for some administrators to transition from Hyper-V Server to a Linux-first KVM-based solution.
That will be the topic of my next post.
By the way, this is what running Windows 8.1 and Ubuntu 21.04 on Hyper-V Server 2019 on Windows 10 Pro looks like performance-wise:
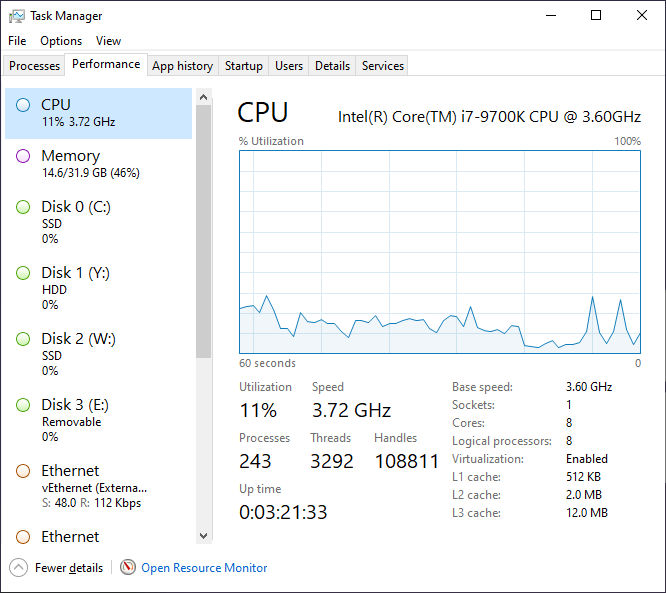
At rest, it barely sips any RAM or CPU:
A note on networking: Nested virtualization networking can be tricky, particularly when running Hyper-V Server on Hyper-V. That configuration is outside the scope of this article, perhaps in a follow-up post. In real world production your Hyper-V Server would likely have a dedicated physical NIC bound for each VM.


