Creating A Lightweight Windows Container Dev Environment without Docker Desktop
Working with Windows Containers without Docker Desktop from PowerShell.

Introduction
If you are getting started with Windows Container development, one option is to install Docker Desktop.
Docker Desktop gives you access to both Windows Containers and Linux containers, by leveraging WSL 2.
Another option may eventually be Rancher Desktop if they add Windows support, but it is currently limited to Linux containers.
But if you prefer a lighter, command line approach to working with Windows Containers, it is possible to install and use Docker static binaries without Docker Desktop.
The Docker static binaries are distributed under the Apache 2 license and do not require a Docker Desktop subscription, even for commercial use.
The downside to this approach is that Docker static binaries on Windows do not support Linux containers, buildx, docker scan, or docker compose functionality.
The flip side though is that if you are the type that prefers minimal command line interfaces then you can also install 'native' Linux Docker on WSL 2 without Docker Desktop and switch back and forth as needed.
Requirements
Windows Containers requires Windows 10/11 Pro or Enterprise version 1607 or higher.
To get started, in Windows Features enable:
- Containers
- Hyper-V
and reboot if necessary.

Alternatively, you can open PowerShell as Administrator and run:
Enable-WindowsOptionalFeature -Online -FeatureName Microsoft-Hyper-V -All
Enable-WindowsOptionalFeature -Online -FeatureName Containers
Install Scoop
Open PowerShell as your normal user, ideally in the new Windows Terminal, and run:
Invoke-Expression (New-Object System.Net.WebClient).DownloadString('https://get.scoop.sh')
If you get an error about PowerShell script execution policy:

You need to change the execution policy with:
Set-ExecutionPolicy RemoteSigned -scope CurrentUserThen re-run:
Invoke-Expression (New-Object System.Net.WebClient).DownloadString('https://get.scoop.sh')Install Useful Scoop Tools
In PowerShell use Scoop to install tools that improve the use of Scoop, specifically git and aria2. git enables Scoop to update itself. aria2 speeds up downloads.
scoop install git aria2
Install Docker Binaries
In PowerShell use Scoop to install the Docker static binaries:
scoop install docker
Enable the Docker Service in Windows
We now need to enable and start the Docker Service in Windows. This requires a PowerShell instance with elevated privileges as Administrator. In PowerShell start an elevated shell with:
Start-Process PowerShell -verb RunAs
Enable the elevated PowerShell to make changes in the prompt. Then in the elevated PowerShell run:
dockerd --register-service ; Start-Service docker ; exit
This will register the service, start it, and then exit the elevated Administrator shell. If you open Services, you should now see the Docker Engine listed:

It will start automatically on Windows boot. If desired, you can configure it using Services to only start it manually.

Enable User Access To Docker Service
By default, non-privileged Windows users cannot reach the Docker Service. At this point if you run docker run hello-world:nanoserver as a non-privileged user, you will encounter the following error:

docker: error during connect: This error may indicate that the docker daemon is not running.: Post "http://%2F%2F.%2Fpipe%2Fdocker_engine/v1.24/containers/create": open //./pipe/docker_engine: Access is denied.
See 'docker run --help'.
There are two solutions.
One, to always use an elevated PowerShell to work with Docker. This is quick and easy but is not advised. One mistake and you can cause irreparable damage to your Windows installation. You can even configure this in Windows Terminal:

Second, my recommended method, is to use dockeraccesshelper to enable and configure access to the Docker Service for non-privileged users.
Install dockeraccesshelper
dockeraccesshelper is an open source PowerShell module to allow non-privileged users to connect to the Docker Service.
To configure dockeraccess module, open another elevated PowerShell:
Start-Process PowerShell -verb RunAs
Enable the elevated PowerShell to make changes. Then in the elevated PowerShell install dockeraccesshelper with:
Install-Module -Name dockeraccesshelperAccepting all the prompts.

Import the dockeraccesshelper module with:
Import-Module dockeraccesshelperNote, if you encounter the following error:

Run the following to enable execution of remote signed PowerShell scripts for the current user:
Set-ExecutionPolicy RemoteSigned -scope CurrentUserThen re-run:
Import-Module dockeraccesshelper
Finally, we need to configure dockeraccesshelper by running:
Add-AccountToDockerAccess DOMAIN\USERNAMESubstituting DOMAIN and USERNAME for the domain and username of your non-privileged user.

If you are not sure what your domain and username are, you can use the whoami command in the PowerShell shell of your non-privileged user, then copy and paste it into the elevated PowerShell:

Then exit your elevated PowerShell and return to your non-privileged PowerShell with exit:

If we return to the non-privileged PowerShell, we can re-run docker run hello-world:nanoserver:

And with everything right we should see:

You now have a lightweight environment configured for working with Windows containers using Docker from PowerShell.
At rest, dockerd uses about 20MB of RAM:

Build Example Windows Container
I have a Dockerfile that builds a Windows container with a development environment for the Nim programming language.
You can clone the repository with:
git clone https://github.com/sirredbeard/nim-windows-container
Drop down into the directory:
cd .\nim-windows-container\And build it locally with:
docker build . --file Dockerfile --tag nimstable-ltsc2022
Or, alternatively, pull it directly from the GitHub package repository with:
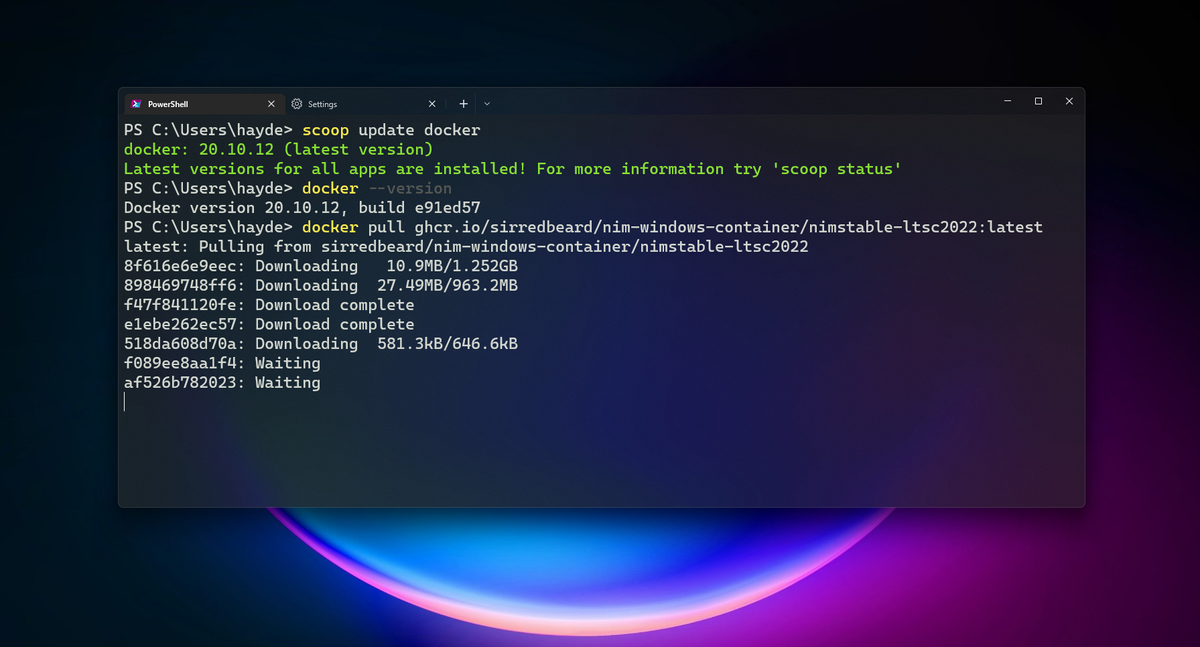
docker pull ghcr.io/sirredbeard/nim-windows-container/nimstable-ltsc2022:latestTo start playing with it and see how Windows Containers are built.
Maintenance
To update Scoop, run:
scoop updateTo update Docker using Scoop, run:
scoop update docker